Check Demo Check code on github
Introduction
Without a doubt, Bootstrap is one of the most popular framework but you can’t just use its javascript goodness in angularjs applications. Fortunately, Angular guys created directives for Bootstrap components. So today let’s create a basic application that uses UI Bootstrap’s modal
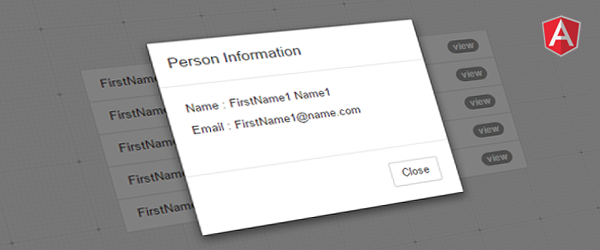
We will create an application that displays a list of people. Each person on the list has a clickable badge that when clicked will open a modal displaying the other informations of that person.
HTML Setup
It’s basic html setup using bootstrap3 framework. We used the list-group component of bootstrap to display the people list. We also included the angular.js and app.js scripts.
<html>
<head>
  <meta charset="UTF-8">
  <title>NG-Modal</title>
  <link rel="stylesheet" href="css/bootstrap.min.css">
</head>
<body>
  <div class="container" ng-controller="PageCtrl">
    <div class="row">
      <div class="col-xs-12 col-sm-6 col-sm-push-3">

        <ul class="list-group">
          <li class="list-group-item">
            FirstName LastName
            <a class="badge">view</a>
          </li>
        </ul>

      </div>
    </div>
  </div>

  <script src="js/angular.min.js"></script>
  <script src="js/app.js"></script>
</body>
</html>
The Angular Application
In app.js let’s instantiate our app. Then create a controller called PersonCtrl and create an array of people.
angular.module('personApp', [])
  .controller('PersonCtrl', function($scope){
    $scope.persons = [
      {id:1, "name":"Test1 Name1", "email":"test1@name.com"},
      {id:1, "name":"Test2 Name2", "email":"test2@name.com"},
      {id:1, "name":"Test3 Name3", "email":"test3@name.com"},
      {id:1, "name":"Test4 Name4", "email":"test4@name.com"},
      {id:1, "name":"Test5 Name5", "email":"test5@name.com"}
    ];
  })
Then we’ll go back to our index.html and setup the angularjs directives - ng-app and ng-controller.
<html ng-app="personApp">
....
....
  <div class="container" ng-controller="PersonCtrl">
Then we will use ng-repeat to display our people array.
<li class="list-group-item" ng-repeat="person in persons">
  {{person.name}}
  <a class="badge">view</a>
</li>
The UI Bootstrap Setup
The UI Bootstrap doesn’t have any javascript dependencies except angularjs. Go to UI Bootstrap page, download and include the script in your html.
<script src="js/angular.min.js"></script>
<script src="js/ui-bootstrap-tpls-0.13.4.js"></script>
<script src="js/app.js"></script>
Then add ui.bootstrap to our module.
angular.module('ngmodal', ['ui.bootstrap'])
And lastly, inject the $modal service to our controller.
.controller('PersonCtrl', function($scope, $modal){
  ...
})
Creating the Modal
Add ng-click directive on the badge and pass openModal(user) function, we’re passing the user as parameter to the function. We will create that openModal() function inside our PeopleCtrl.
<li class="list-group-item" ng-repeat="person in persons">
  {{person.name}}
  <a class="badge" ng-click="openModal(person)">view</a>
</li>
Now let’s create the function openModal in our PeopleCtrl controller.
$scope.openModal = function(person){
  $modal.open({
    templateUrl: 'partials/personmodal.html',
    controller: 'ModalCtrl',
    resolve: {
      selectedPerson: function () {
        return person;
      }
    }
  });
}
The function above will call the $modal’s open method with the following options:
templateUrl- a path to a template representing modal’s content (we will create this later)controller- a controller for a modal instance (we will create this later)resolve- members that will be resolved and passed to the controller as locals (remember we pass person as an argument of our openModal() function? We will pass that person here so it will become available in the modal’s controller)
Now, lets create the modal controller.
.controller('PersonCtrl', function($scope, $modal){
  ...
})

.controller('ModalCtrl', function($scope, $modalInstance, selectedPerson){
  $scope.person = selectedPerson;
  $scope.modalClose = function(){
    $modalInstance.dismiss('cancel');
  }
})
In the controller above, we we’re able to inject selectedPerson because we passed that through the resolve. Now we can access the clicked person’s information (selectedPerson). We also create a function to close the modal using the .dismiss() method of the injected $modalInstance.
And lastly, let’s create the template required by our modal instance. It’s just a very basic bootstrap modal with modal-header, modal-body, and modal-footer. We will display the person’s information in the modal body. And at the modal footer is a button to close the modal.
<div class="modal-header">
  <h4 class="modal-title">Person Information</h4>
</div>
<div class="modal-body">
  <p>Name : {{person.name}}</p>
  <p>Email : {{person.email}}</p>
</div>
<div class="modal-footer">
  <button class="btn btn-default" ng-click="modalClose()">Close</button>
</div>
And that’s it! Simple and easy.
